Install and create your first documents
From a template and a sheet to a folder of PDFs in about five minutes.
1. Prepare the sheet
Row 1 holds the column headers; every row below is one document. For certificates, that might be Name, Course, Email, Completed on.
2. Prepare the template
Create a Google Doc and write it as the finished document should look, putting a placeholder wherever a value goes: {{Name}}, {{Course}}, {{Completed on}}. The text inside the braces must match a column header (capitalisation doesn’t matter). See templates and placeholders.
3. Install and open the add-on
Install from the Google Workspace Marketplace. Open the spreadsheet and choose Extensions → Row to Doc → Open.
4. Paste the template link and set the options
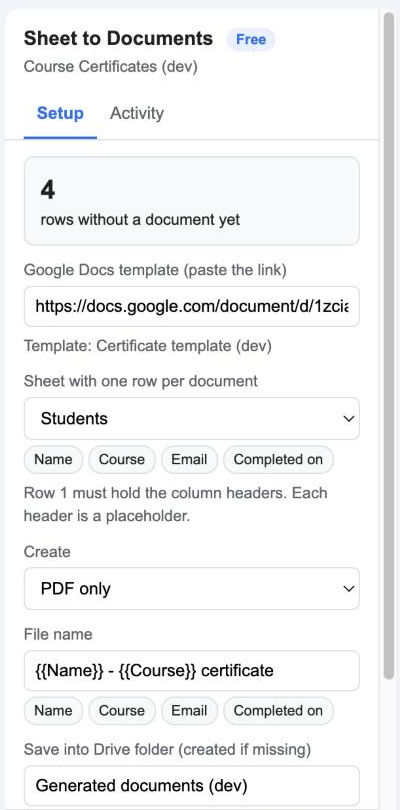
- Paste the Doc’s link. The sidebar confirms the template’s title.
- Pick the sheet. Your headers appear as chips.
- Choose PDF only, Google Doc only or both.
- Set the file name, for example
{{Name}} - {{Course}} certificate. - Name the Drive folder the files should go into.
5. Test with the first row
Click Test with first row. The add-on makes one file (named with “(test)”), shows an open link in the green bar, and writes nothing to the sheet. Open it and check the placeholders were filled.
6. Create documents
Click Create documents. A progress bar counts through the rows. When it finishes, a Document link column holds the file for each row.
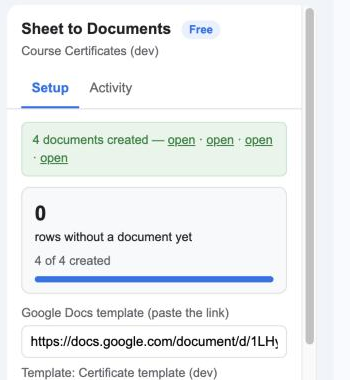
Rows that already have a link are skipped, so you can add rows later and run again. To redo a row, clear its link cell first.