Install and send your first texts
Connect Twilio, write one message, test it, send to the whole sheet.
1. Prepare the sheet
Row 1 holds headers; one row per recipient. You need at least a phone column; anything else (Name, Appointment, Order) can be used in the message.
2. Install and open
Install from the Google Workspace Marketplace, open the spreadsheet and choose Extensions → Text from Sheets → Open. The first time, Google asks you to allow the permissions listed on the privacy policy.
3. Connect Twilio
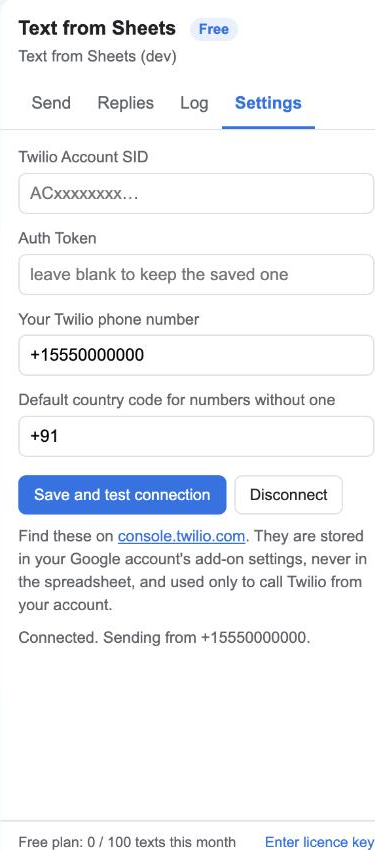
Open Settings and paste your Account SID, Auth Token and Twilio phone number, plus the default country code for numbers that don’t have one. Click Save and test connection. See setting up Twilio if you don’t have an account yet.
4. Write the message
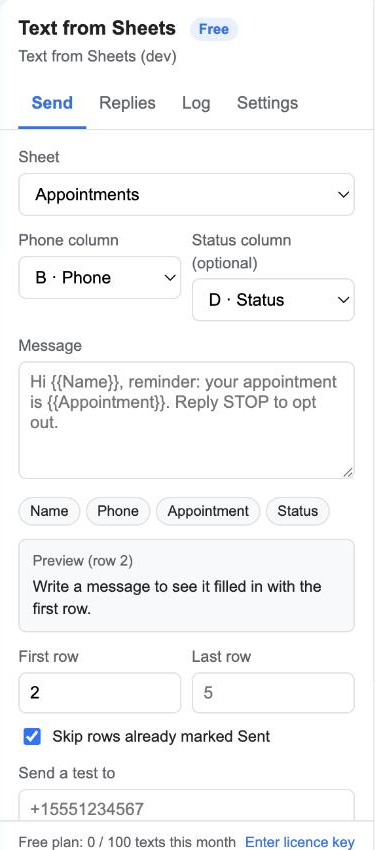
On the Send tab choose the sheet and the phone column (the add-on guesses a column called Phone, Mobile or Number). Optionally pick a status column. Then write the message; click the header chips to insert placeholders:
Hi {{Name}}, a reminder that your appointment is {{Appointment}}. Reply STOP to opt out.The preview under the box shows row 2 filled in and the character count. Under 160 characters is one SMS segment.
5. Send a test
Type your own mobile number in Send a test to and click Send test. The message arrives within seconds using the first row’s values.
6. Send to all
Click Send to all and confirm. Rows are sent in small batches with a progress bar; Stop finishes the current batch. Each row’s status cell gets Sent 4 Nov 10:32 or Failed: reason. Run again later with Skip rows already marked Sent ticked to reach only new rows.
7. Replies
Open the Replies tab to see what people texted back. Everything sent is also in the SMS log tab of the spreadsheet.